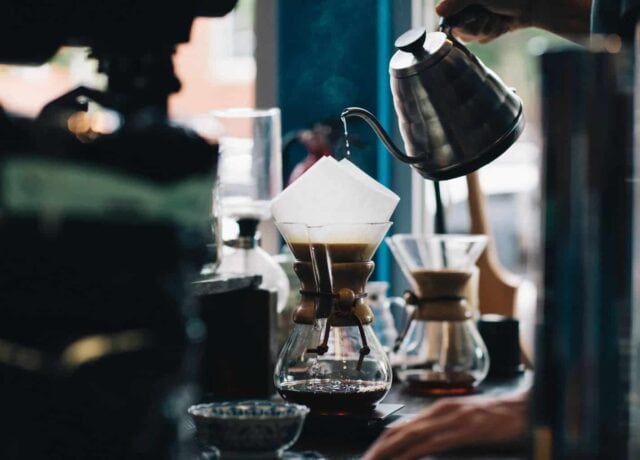
We are fanatics when it comes to pour-over coffee makers. These ingenious little contraptions empower coffee lovers to brew a single cup of coffee without resorting to the indignity of using a Keurig or groping through the guesswork of tinkering with a full-sized machine.
Far from being a one-size-fits-all brewing solution, though, drippers must be selected carefully and employed properly to draw out the complexities of your favorite beans and spare you the disappointment of suffering through a cup that’s just so-so. Sadly, most aren’t up to the task.
Most drippers, however, aren’t the Hario V60.
What is the Hario V60?

The Hario V60 has a unique conical silhouette. It takes its name from the V-shaped sides of its conical brewing chamber, which are pitched at a 60-degree angle.
The steep angle of the V60’s sides makes for a deeper coffee bed than the average pour-over dripper. This allows the maximum contact time for the water as it passes through the coffee grounds.
The inner surface of the V60 has spiralized ridges that allow airflow between the coffee filter and the surface of the dripper. This helps make sure the brew doesn’t get choked up.
The other unique feature of the Hario V60 is the large hole at the bottom, which allows the water to flow through the grounds easily.
Meet the Different Types of Hario V60s
The V60 moniker refers, not to a single dripper, but to a series of pour-over coffee makers, all of which feature Hario’s trademark geometry, large drainage hole, and spiraled ridges. The V60 comes in three different sizes and various materials.
Which Material Is Best for a Hario V60?
Ceramic
The “standard” is the heftiest of the V60s. As with any ceramic coffee dripper, you need to pre-heat it so it doesn’t cool your water too much when you’re brewing.
Once it’s heated, it holds the heat well and keeps an even temperature for the brew. These are also the priciest V60 brewers.
Glass
Glass is less durable than ceramic, but is still a premium material with a similar thermal mass to ceramic. You’ll want to preheat your glass V60 as well. It’s a non-reactive material, so it guarantees clean, consistent flavor with every mouthful.
Plastic
The unassuming V60 Plastic is the cheapest version of Hario’s signature dripper, but it boasts several unexpected advantages. Lightweight, and basically unbreakable, it requires no preheating and maintains very consistent brewing temperatures.
There are technically two types of plastic V60s. The opaque red and white versions are made with polypropylene plastic that can handle extremely high temperatures without melting or leaching toxins.
The clear Hario V60 is made from a different type of thermoplastic that is also BPA-free, dishwasher safe, and can handle high temperatures (although it can’t handle quite as much heat as the polypropylene versions).
Metal
V60s are also available in stainless steel and copper. These present a trade-off between durability and heat retention. Since metal is so conducive, the models tend to draw heat away from the water, which can have an effect on your brew extraction.
The plus side is that these versions are much more durable than the plastic, ceramic, and glass versions.
Different Hario V60 Sizes
Hario V60s come in three different sizes, giving you options to brew up to six cups at a time. Let’s look at these in further detail:
V60 01
The smallest of the Hario V60s, this is the ideal size for people who consistently brew individual cups of coffee. A batch in the V60 01 is about 8-10 ounces.
V60 02
This is the most common V60 size. It suits most people, as it’s small enough for personal use but big enough to make a couple of batches at a time. The V60 02 will brew batches of about 10-16 ounces.
V60 03
The biggest V60 dripper is probably the least common. It’s best for those who are consistently making batches for groups of 4 to 6 people (or else binging on large personal quantities of coffee).
Further, the V60 03 allows you to make up to about 40 ounces of coffee in a batch.
Hario V60 Filters
Hario V60s use paper filters that are designed to fit perfectly into the 60-degree conical shape of the drippers. They sell three different filter sizes to correspond with the dripper sizes.
The filters come in oxygen-bleached paper or unbleached paper. However, the bleached paper gives off a bit less of its flavor in the coffee than the unbleached paper does.
How to Make Coffee With the Hario V60
What you’ll need
Here’s everything you’ll need to make your pour-over coffee with a Hario V60:
- A Hario V60
- A Hario V60 filter
- A scale – the key to brewing with the V60 is getting the coffee-to-water ratio right, so a digital kitchen scale really helps here.
- A timer
- A kettle to boil water. A kettle with a gooseneck spout will make it much easier to control the pour, and if the kettle offers temperature controls, even better.
- Coffee, unless you’re just making paper-flavored tea.
- A grinder. You’ll want a grinder that gives you good consistency and control in the medium grind range.
- A mug to brew the coffee into
The Best Hario V60 Grind Size
Grind your coffee to a medium-fine coarseness. It’s tricky to describe grind size without talking in microns, but think of a texture that’s finer than sand and will clump a bit if you pinch it together, but isn’t as fine as an espresso grind. That’s what you’re going for.
You’ll have to play around to find the right grind size for your particular coffee and grinder. If you’re using a lighter roast, grind a bit finer. For darker roasts, grind a bit coarser.
If you find that the brew is too weak, try a finer grind. A finer grind size will slow the drawdown a bit, encouraging more of your coffee’s flavors to be extracted.
If the water drips through the coffee too slowly and your coffee is coming out bitter and astringent, make the grind coarser.
The Best Hario V60 Coffee-to-Water Ratio
The most common ratio used for brewing with the Hario V60 is 1:17 coffee to water. In other words, for every ounce (~30g) of coffee, use 17 oz. (~500ml) of water.
This ratio is something you’ll want to adjust to suit your own tastes. Most people agree that the sweet spot is somewhere between 1:15 and 1:18.
Personally, I like to brew my V60 pour-overs at a 1:15 ratio, which makes a slightly stronger cup, although it also tends to be more acidic.
If you aren’t using a scale to measure your ratio, you’ll have to fudge it a bit, since you can’t be as exact with your weights.
You’ll need a tablespoon and a liquid measuring cup (and maybe a calculator). Keep in mind that a level tablespoon of coffee grounds is about 4-7 grams. To keep it simple, we’ll say a tablespoon is roughly 5 grams.
To save you a little math, here’s a basic guideline for brewing with a 1:17 ratio:
| Water | Ground Coffee |
|---|---|
| 8 oz. (237ml) | 14g (2.5-3 tablespoons) |
| 12 oz. (355ml) | 21g (4-4.5 tablespoons) |
| 16 oz. (473ml) | 28g (5-6 tablespoons) |
| 34 oz. (1L) | 59g (10-12 tablespoons) |
Hario V60 Water Temperature
I recommend using water that’s about 205°F to make a pour-over with a Hario V60.
If you aren’t using an electric kettle with adjustable controls, bring the water up to just below a boil (boiling point is 211°F).
For darker roasts, use slightly cooler hot water, and aim for about 190°F for dark roasts. If you don’t have a thermometer, bring the water to a boil and let it cool for a minute or two, depending on the temperature in the room.
Step-By-Step Guide to Making Coffee With a Hario V60
Ok, that’s enough chit-chat — let’s make some coffee! Here’s a step-by-by guide to brewing a cup of coffee with your Hario V60:
Step 1:
Grind your coffee to medium-fine grind size.
Step 2:
Heat your water to 205°F.
Step 3: Prepare your V60
Stack your Hario V60 on top of your mug or whatever vessel you’re using for your brew. Fold your paper filter along the seam and place it in the cone. If you’re using a scale, stack this all on top of it.
Step 4: Rinse the filter with hot water
Before you begin brewing, take a moment to run some hot water through the filter-lined V60 and into your waiting mug.
This “dry run” will not only serve to preheat the dripper and mug, but it will also rinse the filter and get rid of some of the papery taste.
Step 5: Riscard the rinse water and add your coffee to the filter
After you throw out the rinse water, add the coffee and give the V60 a little shake to level out the grounds.
After I level the grounds, I like to press a little divot into the center with my thumb. This will help more of the grounds saturate. If you’re using a scale, now is the time to zero it out, so you can measure the water as you pour.
Step 6: Start your timer and bloom your coffee
Start your timer, then pour 80-100g of hot water to wet the coffee grounds. Start at the center and pour in a circular motion outward. Aim to get all the grounds wet within 10 seconds.
Blooming the coffee lets the sour-tasting carbon dioxide in the beans bubble out, providing a sweeter brew. Once the initial pour is done, give the brewer a gentle swirl to help distribute the water.
Step 7: Pour the rest of your water
Rather than pouring the water all at once, pour it in short pulses, adding a bit of water at a time. Move the kettle around as you pour, rather than pouring it into one place.
Try not to pour too close to the edge, as that will cause the water to channel through too quickly. Overall, the brew time should take anywhere from 2:30 to 3:30.
Conclusion
The Hario V60 coffee brewer is an impeccably designed piece of coffee brewing equipment that makes one-and-done brewing an effortless feat, whether you’re a practiced hand with pour-overs or have never made a drop of fresh coffee in your life. It’s the kind of dripper that will keep you coming back for “one more cup” over and over again throughout the day, which is just about the highest compliment we can pay it.
Happy Caffeinating!

