If you’re serious about your coffee, you know that when brewing your morning cup of joe, nothing’s better than freshly ground beans. But if you’re a newbie to the wonderful world of java, however, you may be asking: what’s the big deal about freshly ground beans? Won’t that bag of pre-ground beans make good coffee?
Sure, it will. But why settle for good when you could have great? That’s what grinding your own beans gets you — a great cup of coffee. This is true for a couple of reasons:
- Grinding your own beans gives you total control of the grind size, which hugely impacts the flavor extraction as your beans brew.
- The coffee will taste fresher. You see, the clock starts ticking on the lifespan of a coffee bean’s maximum flavor starts ticking the second it’s removed from the roaster, and it begins counting down even faster once the beans have been ground. Your best bet at drinking the most flavorful cup of java possible is to use coffee beans that were ground mere moments before brewing…who knows how many weeks that pre-ground coffee from the grocery store has been sitting in that bag? Chances are, it’s already lost a good deal of flavor.
Okay, so maybe now you’re sold on fresh ground beans. After all, you’re probably as crazy for coffee as we are, so you’ll do anything to get a delicious cup. But now the question remains: how do you grind coffee beans at home?
We’ve got you covered!
How to Grind Coffee Beans with a Grinder
The first method of grinding coffee beans is probably the most obvious: use a coffee grinder. Duh!
There are quite a few kinds of coffee grinders on the market, and how you use the machine varies based on the kind you purchase. Electric or manual, burr or blade…there are a lot of choices to make, and we’re going to help you narrow it down.
What kind of coffee grinder should I buy?
We have a guide to all our favorite coffee grinders you can check out here, but if you’re not feeling up to doing any extra reading, we’ll give you the gist.
Each coffee grinder and its directions for use differ depending on what product you buy, so be sure to check out the instruction manual after making a purchase. But essentially, each grinder falls into one of two categories: burr or blade.
Burr Grinders
Burr grinders are the products of choice for coffee professionals…and us, too! They use two oscillating plates called burrs to crush and grind whole bean coffee, and you can find both electric and manual models.
A burr coffee grinder is preferred by most because it gives you coffee that’s a consistent size, and when it comes to coffee brewing, size really does matter. The more uniformly ground the beans are, the better the flavor extraction will be when you begin brewing.
Within this category are flat disk burr coffee grinders and conical burr grinders. The primary difference between these machines is the shape of the burred rings inside of them. Of these two, flat disk grinders are said to be the most consistent, especially if you need a fine espresso grind, but they’re also more expensive.
Each of these has its own set of pros and cons, so you’ll need to do a bit of research before making a purchase. However, both options manage to give you precise grinds.
Blade Grinders
Blade coffee grinders, on the other hand, do exactly what we know blades do: they cut! Both the electric and manual versions of these grinders use a spinning blade to chop up the coffee beans.
While these machines tend to boast a lower price point than burr grinders, they’re not always the best choice for meeting your grinding needs. Unfortunately, a blade coffee grinder gives you inconsistent grinds, which leave you with a mug full of irregularly flavored coffee and probably a bit of disappointment.
Alternative Coffee Grinding Methods
Maybe you bought a grinder a few years ago, but now you find yourself weeping in your kitchen because the machine gave up the ghost. Or maybe you found yourself in the middle of an unusual coffee setup with whole beans and no grinder.
Fear not! We’ll show you how to grind coffee beans with tools you can find in most kitchens. And if you’re traveling, you’ll be able to find at least a few of the tools necessary for grinding beans in a typical pharmacy or discount department store, like Walmart.
Of course, you’re really hard-pressed for tools, you could always go full caveman and smash up your coffee beans with a big rock. But because we hope it doesn’t come to that, we’re going to give you a few more civilized coffee grinding options to choose from if you don’t have a grinder on deck.
Blender
This alternative may be a little obvious, but it works! But be warned: using a blender for grinding beans is a little trickier than it sounds.
Blenders work best when there’s liquid inside to help move around the solid items you put inside of them. If you’ve ever tried to make a smoothie or milkshake without enough liquid, you know how quickly it can hang up your blender blades and burn up your blender’s motor.
To get a decent medium grind from your blender, check to see if it has a grind setting first. If it doesn’t have one or you plan to use a one-speed personal blender, a good rule of thumb is to add a small amount of beans, they use a series of short pulses to grind them to a proper consistency. Remove the grinds, then begin another small serving until you’ve ground all you need. This will take some time if you’re planning to brew a whole pot for your friends, but going through this step of the process slowly will keep your blades from getting stuck.
It’s important that you only use a small serving of beans in a blender. If you throw half a bag of coffee beans into any old blender, you’ll end up with large chunks of beans throughout the java, or worse…you could cause irreversible blender damage trying to do a task the machine is just not up to.
Mortar and pestle
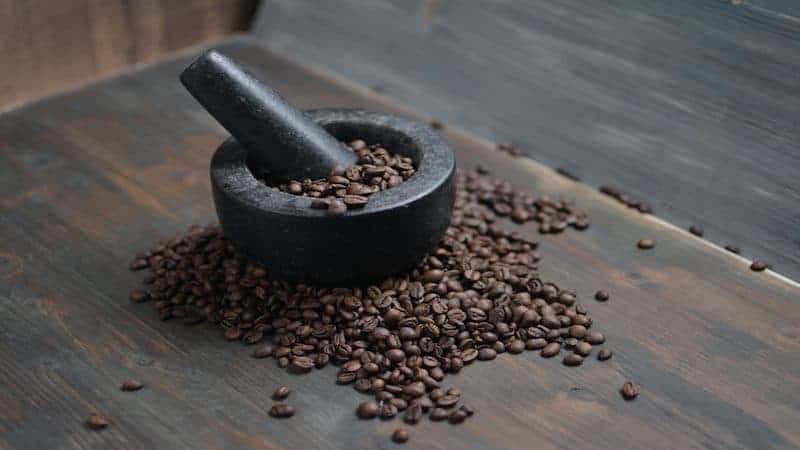
A mortar and pestle is a far more civilized option than say, slamming your coffee beans with a rock, but still manages to be pretty old school. This method of crushing things dates back to ancient Egypt, and you may already have one of these in your kitchen for making pesto, aioli, or chimichurri.
If not, you can buy a mortar and pestle in the kitchenware section of most stores. You probably won’t achieve the perfect grind, but you’ll get ground coffee you can use in a pinch. A common mistake that occurs when using a mortar and pestle to grind beans is over-crushing them, then ending up with a pile of unfilterable dust.
You’ll need about two tablespoons of coffee grounds per cup of java you want to brew, so if they fit into your mortar, add all the beans you’ll need at one time.
Use the pestle and a little bit of elbow grease to crush them against the bottom of the mortar. Stir them up a bit as you go to ensure you get all the beans crushed, and remember not to go overboard. If the grounds are too powdery, you’ll end up brewing a cup full of coffee sludge.
Hand mincer or meat grinder
If you’re not familiar with this device, let us give you a visual: think the old metal pencil sharpener your elementary school teacher probably had on her desk. Hand mincers, or meat grinders, are devices used to finely cut up all sorts of meat and vegetables.
It’s easy to see how a mincer could function well as a manual coffee grinder. The stainless steel or plastic machine has an internal blade assembly that’s controlled by a hand crank and works to chop up whatever you put into it, including coffee beans.
To get your grind on with your handy dandy hand mincer, measure out the amount of beans you want to grind. Be sure to place a bowl or measuring cup at the machine’s opening to catch the grounds as they exit, then turn the hand crank slowly while pouring the beans into the mincer.
Once you’re finished, you can sift through the grounds and put any large pieces back through the meat grinder a few times if necessary.
Meat tenderizer
The meat tenderizer is a small, metal hammer used for softening and flattening cuts of meat. The mallet’s head has two flat sides that are covered with little bumps or spikes, and well…you can probably guess how it works. But before you begin your bean smashing, let us offer you a bit of useful advice.
First, you’ll want to pour your beans into a zipper freezer bag. Press all the air out before sealing the bag so it doesn’t pop like a balloon, then wrap the bag in a dish towel so you won’t puncture it with the meat tenderizer. Use just a little bit of force to hammer the beans as evenly as possible. Make sure you check your progress every few whacks; you don’t want to render your coffee beans useless!
Hammer
Yup. The one in your toolbox.
While the hammer doesn’t have nearly the surface area of a meat tenderizer, it will do the same job in the same manner. You probably won’t get the best grind with a hammer, but you’ll end up with a decent enough result to brew a cup of coffee.
A hammer is a hammer, so it doesn’t really matter which type you use, but you’ll probably want to avoid using a sledgehammer for, er…obvious reasons.
To make the coffee crushing process as neat as possible, put the beans in a zipper freezer bag, squeeze the air out before sealing it, and wrap it in a dishtowel before going to town on it. Hammer evenly, and try to avoid obliterating your coffee.
Rolling pin
Whether you roll with a standard wooden model, a heavy marble one, or one made of shiny stainless steel, a rolling pin is a good way to grind your coffee beans without a grinder. This method gives you a more even grind than a hammer, but it’s still just as convenient since you probably already have one in your home.
The first thing you’ll need to do is measure your coffee beans, then pour them into a zipper bag. Push out as much air as possible, then seal the bag. Begin rolling the pin over it slowly, moving from one side of the bag to the other.
If you roll from the bottom of the bag toward the zipper, it may force your beans out of it and make a big mess. Add a little extra mess protection by wrapping the bag in a towel, but know that the padding could extend your rolling time.
If you don’t happen to have a real rolling pin, you can substitute it with a sturdy glass bottle. But be careful — no one wants broken glass in their coffee or hands.
For a small fee…
If getting a grinder isn’t currently feasible for you and none of the above options are workable, don’t fret; you’ve got two more options. Drive to the nearest grocery store or coffee shop with a grinder, and see about grinding your beans there. Just remember to ask about their policies first; some places may not grind up beans you didn’t purchase from them.
Note that a store or reputable coffee roaster will likely charge a small fee or require you to make a purchase, so keep that in mind.
What’s the second option, you ask? Find a friend with a grinder, of course! Chances are, they won’t charge you anything.
Coffee Grinding Questions
How fine should I grind my coffee beans?
Now that you know how to grind your beans with or without a grinder, you’re probably wondering just how fine your result should be. Well, that depends entirely on the brewing method you intend to use.
Different coffee brew methods require different-sized grinds. We have a handy coffee grind chart if you want to take an in-depth look at matching home brewers to coffee grind size, but if you just want a brief overview, know that espresso machines need extra-fine, powdery coffee particles, a drip coffee maker responds best to beans that have been crushed to a medium grind size, and your beloved cold brew maker needs a coarser grind.
Is it worth it to grind your own coffee?
Our answer to this is a resounding YES!
First of all, though convenient, pre-ground coffee won’t always produce the freshest cups of joe because you don’t know exactly when it was ground or how long it’s been losing its flavor in the bag. So, if you’re passionate about fresh coffee (and why wouldn’t you be?), your best bet is to grind your java yourself right before you brew it.
Can you grind coffee beans in a food processor?
Yes, you can grind your beloved coffee beans in a food processor.
But unfortunately, this grinding method leaves you facing the same problem you would with a blade grinder: you won’t have a uniform grind size, which means uneven flavor extraction when you brew the ground beans. But if this isn’t a dealbreaker for you, using a food processor to grind beans could be a viable option.
The grinding process here is quite similar to if you were using a blender. Turn the food processor on in short bursts, repeatedly starting and stopping the pulses until you end up with coarse grinds.
Do coffee beans go bad?
As much as we wished coffee lasted forever, like all good things, its lifespan does indeed come to an end. If unused, both whole bean and ground coffee will eventually go stale.
Whole beans can typically last in your pantry for about six to nine months, so long as they’re in a sealed container. An unopened package of ground coffee can be stored for three to five months. Extend your coffee’s lifespan as long as possible by storing it in an airtight container and keeping it away from light and moisture.
Stay On Your Grind
If you’ve got a few extra dollars lying around, we think a good coffee grinder is a worthwhile investment for sure. But if you’re brewing on a budget and still want to experience the goodness that is freshly ground coffee, give one of the alternative grinding methods a try. You’ll be surprised at the difference grinding your own beans can make.
Happy caffeinating!


