Keurig prides itself on being an easy and simple coffee machine that anyone can use. And it’s true, Keurigs are some of the most user-friendly coffee machines on the market right now, but even they come with a learning curve.
If you just took your Keurig out of the box and need a bit of help setting it up, you’re not alone. Besides, each model of Keurig machine might have a different setup.

"The best coffee pod I've ever tasted"
Yes, we mean that. Finally, specialty coffee for your KCup machine, roasted fresh to your order by our friends at Atlas Coffee in Austin, TX! Get 50% OFF to try it with code ROASTYPODS
So, if you just got a new Keurig and are feeling a bit frustrated, don’t throw it out yet. Help is here!
Keep reading to learn everything you need to know to operate your brand-new Keurig.

How do I set up a Keurig?
If this is the first time you’re pulling your Keurig out of the box, the first thing you need to do is remove the tape holding all the components together.
You might also find it helpful to wipe the machine down with a damp cloth to remove any dust or debris that got on your machine during shipping and handling.
If your model comes with a removable water reservoir, you will also want to clean the reservoir with warm water and dish soap (Make sure you fully rinse the water reservoir to make sure your coffee doesn’t taste like dish soap.)
Before you replace the water reservoir, be sure to wipe down the water entry point to make sure nothing gets in your coffee that isn’t supposed to be there.
Charcoal Water Filter
If you purchased a water filter kit, now is the time to set up your filter. The charcoal water filter cartridges need to be primed and prepped before they are ready to be placed into the water reservoir.
First, rinse the cartridge under warm, plain tap water for 60 seconds and then place it into a bowl of water and let it sit for five minutes.
Rinse the cartridge one more time to remove any loose charcoal particles before placing it inside the water filter holder.
Place the water filter holder inside the water reservoir and push firmly to lock it into place.
Fill the water reservoir to the max fill line and then replace it on the machine.
Your Keurig is now all set up and ready to turn on for your first brew!
How do I start a Keurig?
Before you try to start your new Keurig, make sure it is correctly plugged into the wall. To start the machine, press the power button.
It can take up to three minutes for your Keurig to heat up and be ready to brew a cup of coffee, depending on the model you have.
Even so, you should notice lights turning on and the machine making noise almost immediately after turning the machine on.
If no lights turn on and the machine hasn’t made a noise after three minutes, make sure the outlet you chose is working. To do this, you can either try a different appliance in the outlet or try moving your Keurig to a different outlet.
If your Keurig is still not turning on, you may need to contact Keurig customer service at (866) 901 – BREW (2739).
What do all the buttons on a Keurig mean?
You’ve probably got the power button figured out, but what do all these other buttons mean?
The exact buttons on your machine vary depending on the model you have, but in general, they have:
Power Button
Most machines will also have a light next to the power button indicating the machine has been turned on.
Auto On/Off Button
Pressing the auto on/off button will turn your Keurig off if it has been left on for a certain amount of minutes.
Cup Sizes
The exact cup sizes your Keurig makes will depend on the machine you have, as well as if you have different buttons indicating size or simply a plus and minus button.
Not all Keurigs label their cup-size buttons, but instead, you can tell the cup size based on the size of the coffee cup on the button.
If your machine makes 6 oz., 8 oz., and 10 oz. cups, it’s safe to say the button in the middle with the medium-sized coffee cup is the 8 oz. cup button.
Note: The Kuerig Mini does not have cup size buttons since the size of your brew is determined by the amount of water you put in the water reservoir.
Iced
If you were to just pour a normal cup of coffee over ice, the ice would dilute your drink.
Pushing the iced button on your machine tells it to brew a stronger cup of coffee to make up for diluting from the ice.
Note: Only certain machines have the iced coffee option. These machines are the Keurig K-Supreme & K-Supreme Plus, K-Slim + Iced, and the Keurig K-Elite.
Hot Water
Some Keurig machines have the option to pour hot water without a K-Cup in the machine.
Strong
Some Keurig machines have a button that will let you make a stronger cup of coffee.
This lets you make a stronger brew without changing the size of your coffee.
LED Indicators
While not technically buttons, the LED indicators are still important to understand.
- Add Water – This light will turn on when your water reservoir is running low and needs to be refilled. The Keurig will not brew if the water level is too low.
- Descale – This light will turn on when your Keurig needs to start the descaling process, which occurs after limescale has accumulated in the machine. Descaling (with either white vinegar or premade descaling solution) cleans the inside of the machine and ensures you’re getting the best cup of coffee possible.
- Heating – This light will turn on when your machine is heating. This can take anywhere between 30 seconds and 3 minutes, depending on the model of the machine you have.
How do I make a cup of coffee?
Now that your machine is set up and you understand all the buttons and lights, you’re ready to make your first cup of coffee.
After you turn your machine on, wait for your machine to finish heating up. You’ll be able to tell when your machine is heated and ready because the heating light will turn off.
Lift the lid and place a Keurig K-Cup inside the K-Cup holder. Gently close the lid.
Next, take your mug and place it under the machine on top of the drip tray.
Simply decide on the size of coffee you want to brew and hit the respective button.
Your coffee should begin to brew immediately, and in a few seconds, your coffee will be ready to drink.
Model Specific Instructions
As I mentioned before, each Keurig is a little different when it comes to how to operate it.
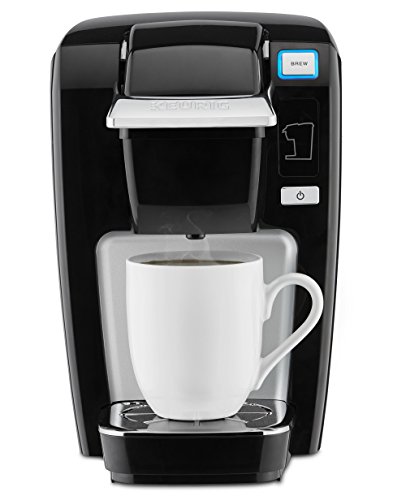
How to Use Keurig Mini
The Keurig Mini is different from other Keurig machines because there are no cup-size buttons.
Instead, start by filling a mug with water and pouring that into the water well. This will determine the size of coffee the machine will brew.
Lift the handle and keep it lifted until all the water has flowed out of the well. Insert your favorite K-Cup pod and lower the handle until it is fully closed.
Press the brew button on the top of your machine and wait while your Keurig Mini brews your cup of coffee.
How to Use Keurig Mini PLUS
The Keurig Mini and Keurig Mini PLUS operate in a similar way. The main difference is the Keurig Mini PLUS has a removable water reservoir, but just like the Keurig Mini, the size of your coffee is determined by the amount of water you put in the water reservoir.
Additionally, with the Keurig Mini PLUS, you also have the option to brew a strong cup of coffee. Simply press this button, and it will brew a strong cup of coffee.
How to Use a Keurig K15
Just like the Keurig Mini and Mini Plus, the size of the brew will be determined by the amount of water you put in the water reservoir.
Keurig does recommend a cleansing brew before brewing a cup of coffee for the first time.
Pour a cup of water into the water well and lift the handle. Keep the handle lifted until all the water flows into the well.
Close the handle without adding a K-Cup and hit the brew button. After the cleansing brew is complete, refill the water well with a second cup of water and complete the same steps with your favorite K-Cup.
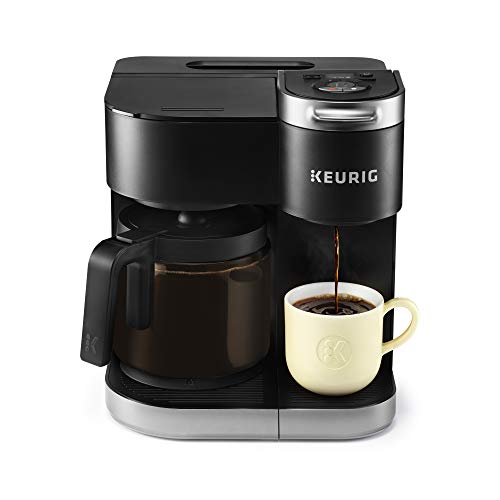
How to Use a Keurig Duo
The Keurig Duo gives you the option to brew a single-serve cup or a pot of coffee. The single-serve side operates the same way as any other Keurig. Simply pop in your favorite K-Cup and hit brew.
On the other side, the carafe side requires a flat bottom paper filter in the basket before scooping in your coffee grounds of choice. Next, place your carafe on the heating plate under the spout. To start your brew, press either the 8-cup, 10-cup, or 12-cup brewing buttons.
The Keurig Duo also has the option to brew a stronger and more intense cup of coffee by pushing the strong button. This option is only available for a single-serve brew, not the carafe option.
How to Use Keurig Duo Plus
Just like the Keurig Duo, the Keurig Duo Plus also has the option to brew a single-serve cup of coffee or pot of coffee.
The single side operates the same way as any other Keurig, simply pop in your favorite K-Cup and hit brew.
To brew a carafe, you need a flat-bottom paper filter in the basket. Next, scoop in your favorite coffee grounds and close the lid. Place your carafe on the heating plate under the spout and press one of three size buttons to begin brewing.
Unlike the Keurig Duo, the Keurig Duo Plus has the option to brew a strong cup of coffee whether you’re using the single-serve side or the carafe side.
How to Use Keurig K-Classic
The Keurig K-Classic is one of the more simple models to operate. Once your machine is fully heated, lift the handle and place the K-Cup of your choice in the pod holder, close the lid, and press one of the three-size buttons to begin brewing.
Be careful not to close the handle before the machine has had a chance to heat up. If you do this, nothing will brew when you hit a size button. To fix this, simply lift the handle and close it one more time.
How to Use Keurig K-Cafe Special Edition
The Keurig K-Cafe Special Edition is the perfect machine for you if you love espresso drinks.
To brew a cup of coffee, simply place the K-Cup of your choice into the pod basket, close the lid, and press the button that corresponds with your desired cup size.
If you want to brew a latte or cappuccino, you’ll need to brew a coffee shot. The best part is, that you can do this with the K-Cups you already have in your kitchen. Instead of choosing a cup size, press the button labeled shot for a concentrated coffee shot.
Next, you’ll need to prepare the milk for your latte or cappuccino. Add chilled milk to either the latte or capp line marked inside the frother. Put the lid back on and replace the frother on the frother base. Press either the latte or capp button to begin frothing the milk.
You know the milk is done when the frother beeps twice and the light is no longer illuminated.
To make an iced latte or cappuccino, simply press the cold button before pressing the latte or capp button.
How to Use Keurig Slim
Unlike other machines, the Keurig Slim does not require a heat-up time.
Simply turn the machine on by lifting the handle and place the K-Cup of your choice in the pod holder. Select your brew size and press the brew button.
How to Use Keurig K-Elite
To brew a cup of coffee with the Keurig K-Elite, lift the lid and place your favorite K-Cup pod inside the holder. After the machine has heated up, close the lid, select your cup size, and press brew.
You will also have the option to brew a strong coffee by pressing the stronger button or brew an iced coffee by pressing the iced button.
To adjust the temperature, press the settings button twice until you see the temperature on the display. Then use the up and down buttons to adjust the water temperature to your liking.
Frequently Asked Questions
How do I use a Keurig frother?
If you prefer drinks like lattes and cappuccinos over a typical cup of coffee, you may want to purchase a Keurig with a milk frother attached. These models are the K-Cafe, K-Cafe Special Edition, K-Latte, and K-Rivo machines.
With the Keurig milk frother, you can make both hot and chilled frothy milk. First, remove the milk frother lid and pour chilled milk up to either the latte or cappuccino line inside the frother. Put the lid back on and replace the frother on the frother base.
Press either the latte or capp button to begin frothing the milk. You know the milk is done when the frother beeps twice, and the light is no longer illuminated.
To make an iced latte or cappuccino, simply press the cold button before pressing the latte or capp button.
Keurig recommends using whole milk to get the best froth consistency. Using milk alternatives or fat-free milk might create froth that loses its bubbles quickly.
Where do I put the water in the Keurig?
Most Keurigs have a water reservoir that you only have to fill once every few weeks, but others, like the K-Mini, have a water well that you have to fill before every brew.
The water reservoir can either be found on the back of the machine or on the side, and the water well can be found on the back.
How do I set up auto-brew?
Some Keurig models offer an auto-brew option.
To set up an auto-brew, press the auto button. You should then be able to set your desired time for the auto-brew to begin. To confirm the auto-brew time, press the blinking brew button. Next, choose your brew size and press the blinking brew button to confirm the size.
Your auto-brew is now set. Make sure you place a clean mug in the machine, so your coffee is ready for you the next morning.
How do I turn off auto-brew?
To turn off the auto-brew option, press and hold the strong button and the 10z cup button for three seconds. You know auto-brew has been turned off when the green auto light is off.
So, there you have it – a simple guide on how to set up your new Keurig and start brewing delicious coffee in no time, whether that be a simple cup of coffee or a refreshing iced latte.
Whether you’re a first-time Keurig owner or just need a refresher to get you up to speed with your fellow coffee lovers, we hope this article makes you confident in your new coffee machine and its coffee brewing capabilities.
Happy Caffeinating!


